That's why I didn't press my luck
Posted: Thu Jun 03, 2004 1:43 pm
The carb bodies have been rinsed and dried. I'm going to go through the color book and make sure I've got all the passages cleared out as I didn't have a small nozzle for the compressed air yeaterday. I don't know what's in that stuff, but when hit by water, what rinses off is milky white. At least it let's you know when you've gotten all of it. It really took it off though. I should have taken a before picture of the inside of the float bowl.

Before

Just out of dip before rinsing and drying.

One I rinsed and blew it out, al the holes are the same silver color.
I've got the small parts soaking in the baskets and will be rinsing and blowing them out this afternoon. I don't know what if any damage it did to the sleeves. From what I could see of them, it looked like they were nylon? I guess I'll have to try and get them apart before I place my "after" order. I know for sure that I'll be getting new needle clips and intake manifold gaskets as I checked mine and they are quite checked when flexing them.
Just looking over all the small parts in the two baskets, I found that I'm either missing or have extra one bolt that I can't find on the exploded diagram. I also found that one of the seats for the idle adjustment had a fiber washer on the shoulder while the other had an O ring and a very thin brass washer squashing it.
May also need one of these
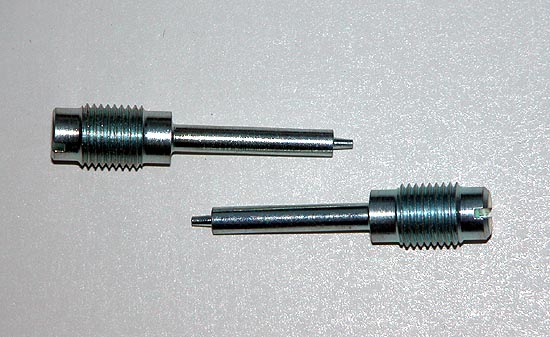
as one of them seems to be pittend and rusted at the end near the threads when I examined everything.
I also screwed up in dipping the pump adjuster housing without removing the adjuster and only realized that there was an O ring in it when checking the parts blowup for the mystery bolt. I didn't take the screw adjusting screw out because it still have the red paint on it and I didn't want to hazard a chance at messing with the adjustment. That should be one of the O rings in the gasket kit. I also have to get a set of dentists' picks as I think there are still a couple fiber washers that I can't get out in some of the seats.
All those DellOrto books together don't have the kind of instructiion re disassembly that I need(such as which notch of the needle the clip goes on) and for sure it's not in the Clymers manual What I should have done was picture each step of each carb with my digital camera but I was under a time frame before rain(outdoors is the best ventilation).
Before
Just out of dip before rinsing and drying.
One I rinsed and blew it out, al the holes are the same silver color.
I've got the small parts soaking in the baskets and will be rinsing and blowing them out this afternoon. I don't know what if any damage it did to the sleeves. From what I could see of them, it looked like they were nylon? I guess I'll have to try and get them apart before I place my "after" order. I know for sure that I'll be getting new needle clips and intake manifold gaskets as I checked mine and they are quite checked when flexing them.
Just looking over all the small parts in the two baskets, I found that I'm either missing or have extra one bolt that I can't find on the exploded diagram. I also found that one of the seats for the idle adjustment had a fiber washer on the shoulder while the other had an O ring and a very thin brass washer squashing it.
May also need one of these
as one of them seems to be pittend and rusted at the end near the threads when I examined everything.
I also screwed up in dipping the pump adjuster housing without removing the adjuster and only realized that there was an O ring in it when checking the parts blowup for the mystery bolt. I didn't take the screw adjusting screw out because it still have the red paint on it and I didn't want to hazard a chance at messing with the adjustment. That should be one of the O rings in the gasket kit. I also have to get a set of dentists' picks as I think there are still a couple fiber washers that I can't get out in some of the seats.
All those DellOrto books together don't have the kind of instructiion re disassembly that I need(such as which notch of the needle the clip goes on) and for sure it's not in the Clymers manual